
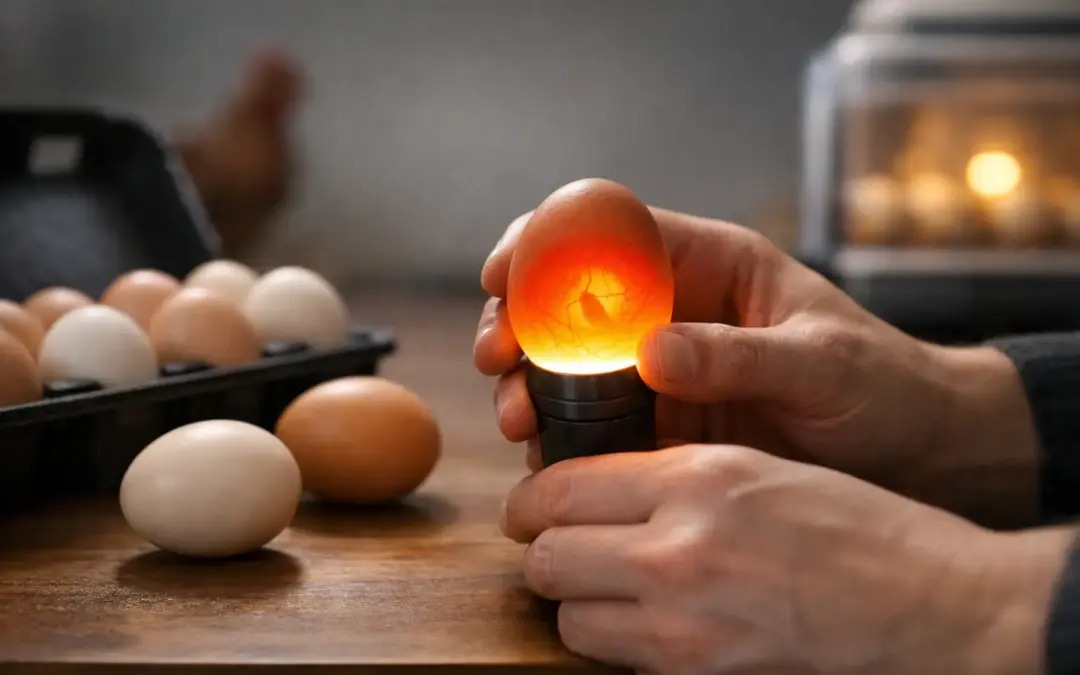
Candling is one of the few chances you get to check progress inside the shell without interfering with the hatch. Knowing how to candle fertile eggs properly helps you identify developing embryos, remove clear eggs where appropriate, and spot warning signs before they affect the rest of the incubator.
The key is restraint. A bright torch and a quick look at the right time will tell you far more than repeatedly handling every egg. Good breeders candle with a purpose, then return eggs promptly to stable incubation conditions.
What candling can – and cannot – tell you
Candling means shining a strong, focused light through the broad end of an egg in a darkened room. You are looking for signs of development: blood vessels, a dark embryo, movement and, later on, the growing air cell.
It does not prove an egg was fertile before incubation. Fertility is confirmed only when development begins. An egg may have been fertile but fail very early, while an apparently dark egg can sometimes contain an embryo that has stopped developing. Treat candling as a practical check, not a reason to over-handle valuable eggs.
When to candle fertile eggs
For chicken eggs, the first useful check is usually around day 7 of incubation. At this stage, a viable egg should show a small dark spot with a network of red veins spreading out from it. Dark-shelled breeds can be harder to read, so use a powerful LED candler and keep your expectations realistic.
A second check around day 14 is often enough. By then, much of the egg should look dark, with a clearer air cell at the blunt end. You may see movement if the chick is positioned favourably.
A final check can be made at day 18, just before lockdown, when turning stops and humidity is raised for hatching. At this point the egg will be largely opaque. Focus on the air cell and obvious problems rather than trying to find the chick itself. Duck eggs and other waterfowl generally develop more slowly, so allow for their longer incubation period.
The right way to candle eggs
Candle in a warm room, away from draughts, and prepare everything before opening the incubator. You need a purpose-made egg candler or a bright LED torch with a narrow beam. Avoid lamps that become hot. Heat, rough handling and prolonged cooling are all avoidable risks.
Work steadily. Lift one egg at a time, cup it gently in your hand and hold the light against the broad end. Rotate it only as much as needed to see the contents. A healthy check should take seconds, not minutes.
If you have a full tray, it helps to mark each egg lightly in pencil with its setting date or breeder pen. This makes it easier to compare what you saw at the previous check, particularly when you are hatching several breeds with different shell colours and sizes.
What healthy development looks like
At about day 7, a developing chicken egg commonly shows a spider-like pattern of blood vessels and a dark centre. The egg will look alive rather than evenly clear. By day 14, the embryo fills far more of the shell and the veins may be difficult to distinguish because of the increasing darkness.
A clear egg at day 7, with no veins or dark point, is usually either infertile or has stopped at a very early stage. If there is any doubt, leave it until day 10 and candle again. This is particularly sensible with very dark brown, olive or blue shells, where visibility is poor.
A distinct red ring can indicate an early embryo loss, often called a blood ring. An egg that was previously developing but now appears uniformly dark with no movement can also be a concern, though do not rush to discard it unless you are confident of what you are seeing. Late-stage eggs are naturally difficult to interpret.
When to remove an egg
Removing a genuinely clear egg can reduce the risk of it deteriorating or leaking in the incubator. Remove eggs with an obvious blood ring, offensive smell, leakage or visible mould as soon as you identify them. Keep them separate from the incubator and dispose of them carefully.
Do not open questionable eggs inside the poultry room or near the incubator. A spoiled egg can be unpleasant, and the contents may contaminate surfaces or nearby eggs. For breeders working with rare or carefully selected lines, patience is often the better call where the evidence is uncertain.
Common candling mistakes
The biggest mistake is candling too often. Curiosity is understandable, especially with eggs from a sought-after breeding pair, but every unnecessary check creates a temperature and handling interruption. Two or three purposeful checks are usually plenty for chicken eggs.
Another is mistaking shell colour, mottling or a large yolk shadow for development. Compare eggs of the same type where possible, and judge the presence of veins rather than darkness alone. Finally, do not confuse a good candling result with a guaranteed hatch. Correct temperature, humidity, turning, ventilation and sound breeding stock still determine the outcome.
Keep simple notes on what you see and when. Over a few hatches, those records will teach you more about your incubator, breeding pens and hatch rates than any single candling session can.