
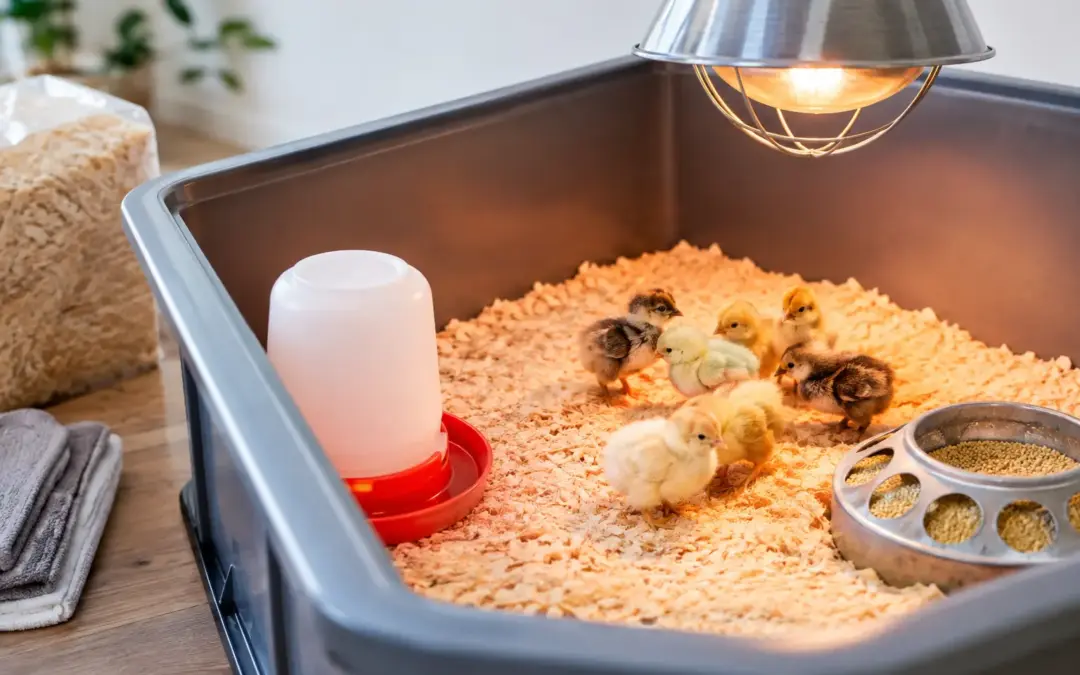
A successful hatch can be lost in a matter of hours if the chicks arrive to a cold, damp or poorly arranged setup. Knowing how to prepare a brooder before the first shell pips gives newly hatched chicks the steady warmth, clean footing and easy access to water they need to get properly started.
A brooder does not need to be elaborate. It does need to be safe, dry, draught-free and tested before chicks go in. Whether you are raising a small clutch of heritage bantams or a larger hatch of table birds, get the basics right first. No noise, no guesswork, just a sound setup for quality stock.
Prepare the brooder before hatch day
Set the brooder up at least 24 hours before chicks are due to arrive. This gives the bedding time to warm through and lets you spot problems with the heat source, thermostat or power supply while there is still time to fix them.
Choose a sheltered indoor space with a stable temperature. A utility room, secure outbuilding or purpose-built rearing area can work well, provided it is dry, vermin-proof and away from household traffic. Avoid garages with vehicle fumes, damp sheds and anywhere prone to sharp temperature drops overnight.
The brooder must also be easy to check without repeatedly lifting chicks or moving equipment. You will need to observe them several times a day in the first week, so practicality matters. Keep a spare drinker, dry bedding and a suitable backup heat source close by.
Start with a clean, secure base
Use a solid-sided brooder, stock box, large plastic tote or purpose-built chick rearing unit that gives the chicks enough floor space and prevents draughts at chick level. Cardboard can serve for a very short period, but it absorbs moisture, is difficult to disinfect thoroughly and creates a fire risk around heat lamps.
Clean and disinfect the brooder between batches, then allow it to dry completely. Damp surfaces and old bedding create ideal conditions for bacteria, mould and coccidial build-up. If chicks are being reared after another group, do not assume a quick sweep-out is enough.
For the first week, allow at least 0.05 square metres per chick as a practical starting point, then increase space as they feather and grow. Large breeds, fast-growing birds and active bantams may need more room sooner. Crowding leads to soiled bedding, bullying and uneven access to feed and water.
Choose safe, reliable brooder heat
Newly hatched chicks cannot regulate their body temperature well. They need a warm zone, not a uniformly hot box, so they can move away from the heat when they choose.
A heat plate is usually the most straightforward option for small and medium hatches. It mimics the shelter of a broody hen, uses less electricity than a lamp and allows chicks to follow a more natural day and night rhythm. Set the legs so chicks can stand comfortably underneath while their backs just brush the plate. Raise it gradually as they grow.
A heat lamp can also work, particularly for larger groups, but it needs greater care. Use a ceramic holder, a proper guard, secure fittings and two independent fixing points. Never rely on a clamp alone. Keep the lamp well clear of bedding, plastic walls and anything that could shift if a chick jumps or the unit is knocked. Heat lamps are effective, but they carry a real fire risk and can keep chicks active around the clock if there is no dark period.
Place a thermometer at chick height beneath or at the edge of the heated area. For the first few days, aim for roughly 32-35C directly under the heat source, then reduce the temperature by around 2-3C each week as feathering develops. The exact setting depends on room temperature, breed, chick age and the heat source itself.
The chicks will give you the clearest reading. A tight, noisy huddle under the heat means they are cold. Chicks spread far away from it, panting or holding wings out, are too hot. Calm chicks resting and moving about across the space are where you want them.
Provide a warm side and a cooler side
Do not heat the entire brooder floor. Position the heat source at one end or over one section, leaving a noticeably cooler area for feeding, drinking and resting. This temperature gradient lets chicks regulate themselves and makes their behaviour easier to read.
Check the setup at night as well as during the day. An outbuilding that feels suitable at lunchtime may become much colder after dark. In a chilly British spring, insulation around the outside of the brooder can help, but do not block ventilation.
Use bedding that stays dry underfoot
Chicks need secure footing from their first hours. Smooth plastic, newspaper and bare cardboard can cause legs to slip, increasing the risk of splayed legs and making chicks reluctant to move around.
Start with a non-slip surface such as paper towel or a clean chick mat for the first day or two. This helps chicks find scattered starter crumbs and lets you monitor droppings. Once they are steady on their feet, use a layer of dust-extracted wood shavings. Choose large-flake, untreated shavings rather than fine dusty material.
Straw is usually too coarse for tiny chicks and tends to trap moisture. Sawdust is unsuitable because chicks can ingest it and it creates dust. Whatever bedding you use, remove wet patches immediately and top up or replace bedding before it smells stale. A clean brooder should smell of dry bedding, not ammonia.
Set out water and feed where chicks can find it
Fresh water is the first priority after chicks arrive. Use a shallow chick drinker designed to prevent drowning, and place it away from the main heat source so the water does not become warm and dirty too quickly. For very small chicks, place clean pebbles or marbles in the drinking channel for the first few days if needed, ensuring they cannot block access to water.
Fill the drinker before chicks are introduced. On arrival, gently dip each chick’s beak into the water rather than forcing it to drink. Most will quickly understand, and the rest often learn by watching.
Offer a proper chick crumb suitable for the species and age of the birds. Put a small amount in a low feeder and scatter a little on the starter surface to encourage natural pecking. Keep feed dry, and do not overfill feeders. Stale crumbs and droppings in feed are a needless disease risk.
Chicks do not need treats, greens or mixed corn in their first days. A balanced chick crumb and clean water will do the job. If you offer anything beyond the formulated ration later, provide suitable insoluble grit once it is needed for digestion.
Ventilation matters, but draughts do not
A brooder needs fresh air. Warm, humid air trapped above wet bedding soon becomes unhealthy, particularly as chicks grow. However, ventilation should be above chick level or diffused through the space, not blowing straight across the floor.
Look for condensation on walls, a stuffy smell or bedding that is wet despite regular changes. These are signs that the brooder is overcrowded, poorly ventilated or both. Adding heat will not solve a damp brooder. More space, drier bedding and better airflow will.
Test the whole setup before chicks go in
Run the brooder for a full day with the bedding, heat source, drinker and feeder in place. Check the temperature in the warm and cool zones, then check again several hours later. Make sure electrical leads cannot be pecked, chewed, splashed or pulled loose.
Have a plan for a power cut, especially if you are hatching early in the season. The best response depends on your group size and housing, but a safe backup heat source, insulated box and the ability to bring chicks into a warmer part of the house can prevent a minor failure becoming a serious loss.
When chicks arrive, keep handling calm and brief. Watch them closely, particularly during the first 48 hours, and adjust the brooder according to their behaviour rather than chasing an exact number on a thermometer. A well-prepared brooder gives each chick the chance to settle, eat, drink and grow into the strong young stock you set out to rear.